Disney Crafting...

mrtoad

Well-Known Member
Just a little something I made with my daughters to share. On our November WDW trip my father came and spend a few days with us. It was great as it really gave my daughters some substantial time with their grandfather (they only get to see each other a couple times a year).

My daughters and I made the frame with buttons we glued on and put in a picture of the 3 of them from our last day together. They gave it to him for Christmas.

There are 8 hidden Mickey's in the frame....

5328878972_0b34903291_b.jpg
 

mrtoad

Well-Known Member
Not 100% thrilled with how these came out. My daughter is a Converse addict (6 pair and counting) and she asked me to make her a pair with Mickey icons on them. I made a stencil and then used silver fabric stencil spray from Tulip to make them. First would recommend you never use this paint. It came out in streams and then spray. Even after spraying if you stopped spraying and then sprayed again, a stream came out. It cause the paint to leak under the stencil and get where it should not have. I did my best to get most off where it should not be but could not get it all, I was very upset.

So I then decided to stitch around with red thread by hand around the icon to give it a clearer definition. It helped and I am much happier than I was but still not all the way there. My daughter is thrilled with them so that is what really counts but still I wish they came out better....

5366751211_fe17ae861c_b.jpg


5367361888_cd9077c4ca_b.jpg
 

SewIn2Disney

Well-Known Member
I still think they're cute!
What kind of stencil did you use? Did you use a freezer paper stencil? I find them to be great because you can iron them right onto fabric and don't have to worry about the paint "leaking" under it.
Maybe you had a defective tulip paint- I worked at a craft store for years, and always used them with all my kids camp crafts and never had a problem!
 

mrtoad

Well-Known Member
I still think they're cute!
What kind of stencil did you use? Did you use a freezer paper stencil? I find them to be great because you can iron them right onto fabric and don't have to worry about the paint "leaking" under it.
Maybe you had a defective tulip paint- I worked at a craft store for years, and always used them with all my kids camp crafts and never had a problem!

Thanks. I did not use freezer paper, I have not done that before and was unsure how to iron that onto a shoe. I used sticky back vinyl like I use for my wall decals. It did not stick great but enough to hold it in place while I sprayed. The problem was when the paint came out at one point it just streamed out instead of sprayed. there was so much that before I could blot it up it had caused the stencil to come up. I am sure you are right and just a defective can.

My daughter is thrilled with them so I am good though... :)
 

Tiggerish

Resident Redhead
Premium Member
Those are fabulous, and the red stitching adds a terrific effect.

I'd say that this is a case of a "happy accident", because the fix for the bad paint made the end result look even better than your original intention. :wave:
 

mrtoad

Well-Known Member
Those are fabulous, and the red stitching adds a terrific effect.

I'd say that this is a case of a "happy accident", because the fix for the bad paint made the end result look even better than your original intention. :wave:

Thanks. :)

I agree the red stitching added to the design so that part was good. I was kicking myself thinking of doing the stitching half way through though as it was killing my fingers pushing the needle through. Any area especially that had some of the paint that leaked on it was very hard to push through. I don't sew so I am sure people who do sew have ways to avoid that but man my fingers hurt. It took me nearly 2 hours to do them.

Thanks again!
 

mrtoad

Well-Known Member
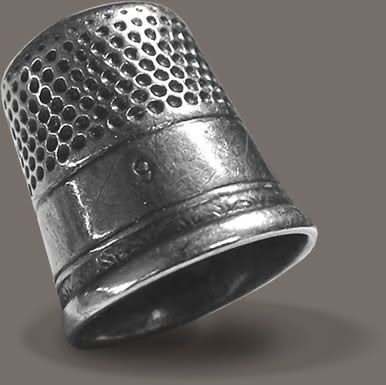
You needed a thimble. Probably two of them. ;) :lol:

thimble_large.jpg

Shows how much i know about sewing... :eek:

If I ever decided to try again I will get one (probably there is one in my wife's sewing bench). I did not even think and my fingers hated me for it....

Thanks!
 

scrapah1

New Member
Love Your Shirts, Quick Question!

Thanks. :) I love making shirts for my kids. The cost savings I have had by making clothes for my kids has paid for the heat press many times over. I paid I think $650.00 for the press when I bought it and just for example, for my older daughter we did not have to buy one shirt for her for school this year (she will not wear anything but t-shirts right now) and made her about 12 new t-shirts. Depending on the shirt I buy for her, I can spend as low as $1.00+ up to about $5.00 for the blank shirts. It costs maybe $2.00 in EcoFilm per shirt. I looked and the 12 shirts I bought her with shipping were $40.68 and so after pressing them I spent around $65.00 for 12 shirts which is less than $5.50 per shirt. If I went and got he t-shirts at someplace like Justice you will spend around $15.00 to $20.00 per shirt. So just on her 12 shirts I saved at least $120.00. You can buy a cheaper press for around $300.00 at a place like Coastal Business Supply.

Yeah the transfer papers you can buy at Staples and places like that are not so great. I use commercial ones that I don't think would work with an iron, I don't think it gets hot enough. For the papers I use I think I need to set my press to around 375 degrees and press for about 20 seconds straight. With an iron I doubt it gets that hot and you can't cover the whole image at once unless really small. I only really do transfer papers on white shirts because with the papers for white shirts are transparent and your white of your shirt shows through and you don't need to trim perfectly though I do trim pretty close to the edge of the image as I don't want a visible box around the design. The papers for colored shirts are opaque white that you print on because you can't print white on a printer. Those types of papers you need to trim perfectly so you don't have a white edge around your image. My cutter actually lets you print images on your computer with registration marks and then you can feed your printed image into the cutter and it will trim around your image for you but you need Adobe Illustrator to use that feature but I can't bring myself to spend the $600 dollars on illustrator just for that. At least not at this point I won't spend it.

Ok, so I made our shirts for our trip last year for a group of 12 (ended up making 52 shirts in all) but they didn't turn our anywhere near what you did. I used amymickeys transfer paper which did a fabulous job but you cut out your design.

I am clearly missing something (probably obvious) but in reading about heat presses I am confused. Do you print out your image on a regular printer and then press it with the heat press? How do you get the amazing cut lines?

I hope that this makes sense!
 

mrtoad

Well-Known Member
Ok, so I made our shirts for our trip last year for a group of 12 (ended up making 52 shirts in all) but they didn't turn our anywhere near what you did. I used amymickeys transfer paper which did a fabulous job but you cut out your design.

I am clearly missing something (probably obvious) but in reading about heat presses I am confused. Do you print out your image on a regular printer and then press it with the heat press? How do you get the amazing cut lines?

I hope that this makes sense!

Hi,

Sorry for the delay in response. I did not see this. What I used is something different than a transfer paper. You don't print on it. It is a solid color sheet that I use a vinyl cutter to cut out the image. So just an example, if I wanted to put a Mickey icon on a shirt, the image on my PC get sent to the cutter and the cutter will cut out the design on the roll of film. Then you cut the sheet off where the design is and remove with an exacto knife the area around Mickey leaving only Mickey on the sheet. The film has heat activated adhesive on it and the heat press heats that and presses it to the shirt.

If you want more information, send me a message and I can send you some information on the cutter and heat press I own. If you are doing only for hobby there are some cheaper ones you can get as well.

Sorry again for the delay.

Mike
 

mrtoad

Well-Known Member
My latest Disney project - A coat/hat rack for my nephew for his birthday. It is made of pine with 4 old Disney comic book covers decoupaged to the front. I will be giving him the comics along with the rack, he is a big comic book nut.

5511000588_420f4dc87c_b.jpg


5511000470_5249462bd1_b.jpg


5510400355_1d5c5bbef2_b.jpg


& the back

5510400245_018fa5e05f_b.jpg
 

SewIn2Disney

Well-Known Member
Gorgeous! How big is it? Hang it where it'll get the best sun!

It is 9x12. And it still doesn't have a place of honor!

Very, very, very cool. I love the retro logos and that is a very nice way to use one. I love it.

Thanks! I love the retro logos too!

My latest Disney project - A coat/hat rack for my nephew for his birthday. It is made of pine with 4 old Disney comic book covers decoupaged to the front. I will be giving him the comics along with the rack, he is a big comic book nut.

5511000588_420f4dc87c_b.jpg


5511000470_5249462bd1_b.jpg


5510400355_1d5c5bbef2_b.jpg


& the back

5510400245_018fa5e05f_b.jpg

Oooh! I love it! Nicely done- and I love how even the back is finished!
 

Register on WDWMAGIC. This sidebar will go away, and you'll see fewer ads.

Back
Top Bottom