Photography Tips

Jahona

Well-Known Member
RAW is also available on many smart phones. So, if you're in a pinch with just a cell phone, this is still great advice!

I was stunned by the amount of noise when I shot RAW on both a Samsung Galaxy S7 and S8. Even at ISO200 It was fair grainer than I thought it should be. I never realized how much noise reduction processing the phone does to output JPEGs. It gives you something to mess around with in post and for a bit more dynamic range.

Always shoot RAW. It gives so much flexibility to change things after the shot.

To build off of this a lot of cameras allow you to shoot both RAW + JPEG. I've found it to be great for viewing photos after, in a file browser vs waiting for the raw images to cache; or for just quick uploads to social media for photos I don't care to spend time with in post.
 

BoarderPhreak

Well-Known Member
If you want to shoot wide open on fast lenses (e.g. f/1.4) during the daytime and your camera doesn't have an electronic shutter, get yourself a 3-stop neutral density filter. For an f/2 lens or so, you can get by with a 2-stop filter. Keep in mind that most electronic shutters aren't useful with rapidly moving subjects (rolling shutter distortion).
 

Elfinko

Well-Known Member
If you're new to photography (like me) and are not sure how to shoot a scene, use a photo service like Flickr to find images similar to what you're looking to shoot. You can see the settings those photographers used and use those exposure settings as a baseline for your own shots.

Example: https://www.flickr.com/search/?text=fantasmic
 

BoarderPhreak

Well-Known Member
If you're new to photography (like me) and are not sure how to shoot a scene, use a photo service like Flickr to find images similar to what you're looking to shoot. You can see the settings those photographers used and use those exposure settings as a baseline for your own shots.

Example: https://www.flickr.com/search/?text=fantasmic
That's a good idea, as is browsing the groups there such as Walt Disney World or even the sketchy Disney HDR and Topaz (I don't condone over the top HDR; it's gruesome - especially when you throw in oversharpening). Not only do you get the camera settings (EXIF) but perhaps inspiration for new ways to see a scene; angle, focal length, lighting, etc. Sometimes you get in a rut (or have no idea what you're doing to begin with) and it's useful to see what others do.
 

BoarderPhreak

Well-Known Member
Want to take your shots to the next level? Play with stitching and bracketing... Or BOTH!

- Stitching: When you combine multiple photos together to make a really large photo (e.g. panorama), to shoot wider than what you've got as far as lens (or to increase resolution) or play with the Brenizer Method. You could even do full 360º panos; handheld works but obviously a tripod is better/easier.

- Bracketing: Set up your camera to take 3-5 shots in sequence, no less than 1-2 stops apart. Plug the sequence into an HDR-capable app and in moderation extend your photo's dynamic range. I stress the in moderation part because it's easy to overdo, and lawd it looks awful (as does oversharpening). Though I will say that a place like WDW lets you push the boundaries with its multitude of deep, wide-ranging colors and fantastical scenery.

- Both: Take your bracketed images to create one HDR image each. Then take the results of that step and stitch them together for the reasons mentioned above. It's a lot of images, a lot of steps and requires a fairly decent computer... But you can end up with some insane images. Here's an example that I took from the roof of an abandoned luxury hotel atop an inactive volcano in the Açores, which is 300MP (MegaPixels!) in its full size:

i.php
 

BoarderPhreak

Well-Known Member
Tripods. We'd all like to bring them. Don't. Not unless you've got a lot of time in the 'World - or plan on really focusing (no pun intended) on photography. For one, it's additional weight and bulk and second, it's a PITA to set up, tear down and having people walking around (hopefully not tripping over) you. Besides, with today's cameras they're less necessary thanks to high-ISO capabilities. Granted, yes, they still hold your camera absolutely still for long exposures. I get that. I've spent week-long trips where I could've brought one, but in the end... I'm (almost) always glad I didn't.

Get yourself a tabletop tripod and use existing infrastructure (e.g. garbage cans, walls, etc.) to get in the ballpark. You won't be able to place your camera exactly where you want, but again, thanks to high resolution cameras, zooms and stabilization - you can crop and otherwise manhandle an image to acceptability. A Gorillapod or bean bag support are also good options, but both have caveats. You need a large Gorillapod if you have a heavy camera and/or lens - and there's no getting around the bulk of a bean bag. If it's the type that screws into the tripod socket, I've found them next to useless. With anything other than a tiny little lens, they fall right over. OOPS.
 

BoarderPhreak

Well-Known Member
Laptops. Skip them, unless you have to for some reason. In most cases, a tablet is plenty, or even your smartphone. Personally, I like to have a fully functioning laptop for a variety of reasons; one of them being someplace to backup SD cards after each day and inspect shots to see if I need to reshoot something important.

I used to swear by the Apple MacBook Air 13" but it's gotten quite long in the tooth and I've since picked up a 2015 MacBook Pro 13" - I skipped the latest versions with the TouchBar, etc. for a bunch of reasons; one of which being the lack of the SD card slot. Bonus, it's smaller than the MacBook Air, if a touch thicker.
 

BoarderPhreak

Well-Known Member
Flashes on rides... No, no, no.

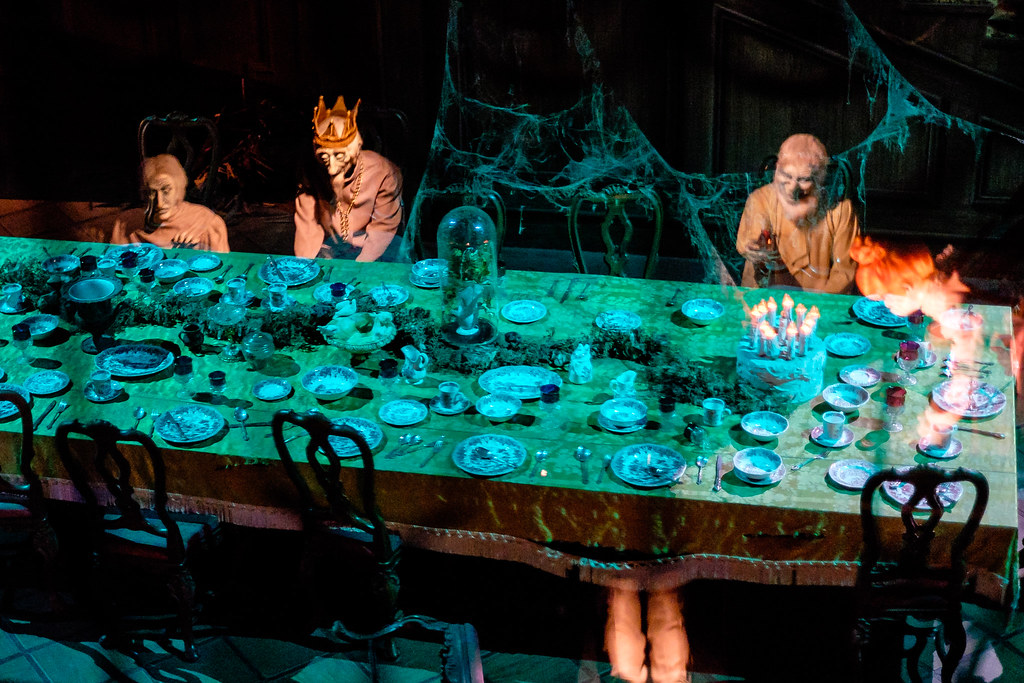
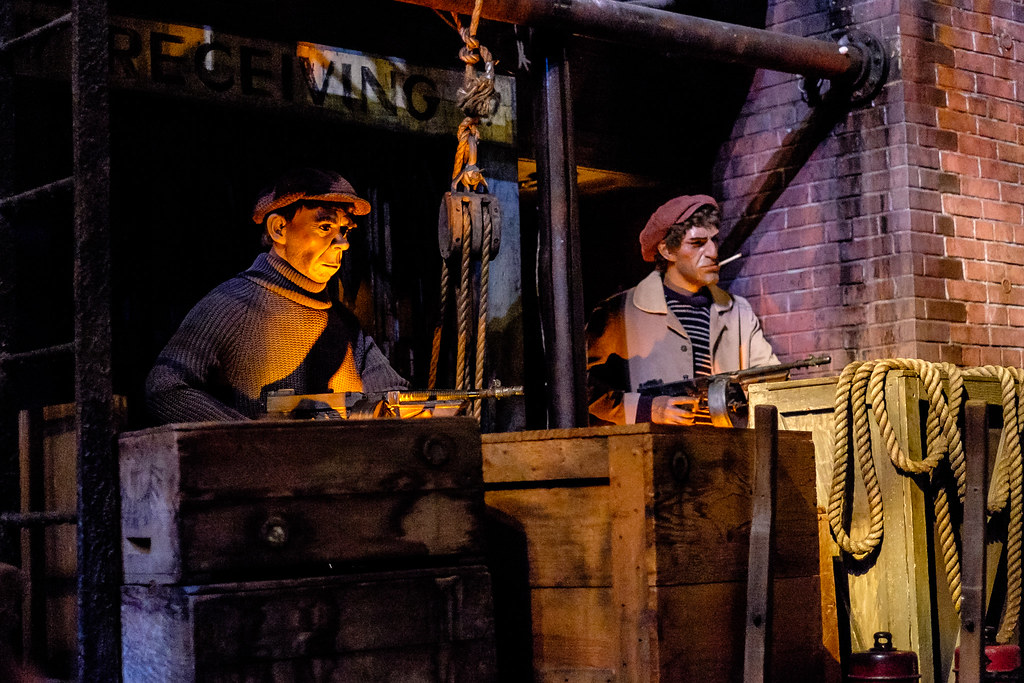
I SMH at people using a flash, besides for the obvious reason. They just won't help the photo and most of the time make it worse. You can't take dark room and make it suddenly bright, especially with those puny smartphone LED "flashes." Granted, without you'd probably get nothing. Either way, it's not going to be a good photo - so sit back and enjoy the ride.

Now, if you've got "a real camera" then crank up the ISO (1600 at the very least if not 3200+) ensure your shutter speed is reasonable (1/15-1/30+) and use a fast lens (f/2 or faster, preferably f/1.2-1.4). Even then, it'll be hit or miss most of the time, depending on your camera. And make sure you turn off your AF Assist Light.
 

Jahona

Well-Known Member
ensure your shutter speed is reasonable (1/15-1/30+)

If your camera or lens has VR / Stabilization built in it can be a godsend at lower shutter speeds. 1/15 of a second can be hard to handhold on a moving ride and VR can save an image at times.


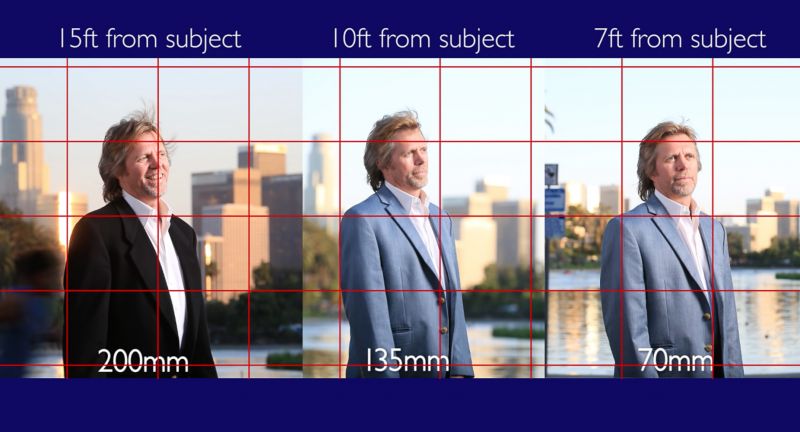
This is more of a perspective tip but instead of zooming in walk towards the subject. You'll capture a wider view of the background.

Here is an example. You notice from the 200mm lens how close the city skyline is to the subject vs the 70mm lens where he feels much farther away.

Moving-V-Zooming-3-800x432.jpg
 

BoarderPhreak

Well-Known Member
If your camera or lens has VR / Stabilization built in it can be a godsend at lower shutter speeds. 1/15 of a second can be hard to handhold on a moving ride and VR can save an image at times.
For sure; it depends on your camera, your skill/technique and of course, the ride (light levels and smoothness). Important to remember though that image stabilization will do nothing to stop movement in the scene - only your own.
 

BoarderPhreak

Well-Known Member
Throw a couple of Q-Tips in your camera bag - for cleaning your viewfinder. Also good to keep it from fogging up in the constant in/out of A/C to the outside. Touch the tip of one end to your tongue, clean the viewfinder and flip it around to finish the job. Voila!

Bonus tip; put your lens cap on when entering A/C areas/inside. This way, when you come out your lens won't fog up so fast.
 

thomas998

Well-Known Member
Flashes on rides... No, no, no.

I SMH at people using a flash, besides for the obvious reason. They just won't help the photo and most of the time make it worse. You can't take dark room and make it suddenly bright, especially with those puny smartphone LED "flashes." Granted, without you'd probably get nothing. Either way, it's not going to be a good photo - so sit back and enjoy the ride.

Now, if you've got "a real camera" then crank up the ISO (1600 at the very least if not 3200+) ensure your shutter speed is reasonable (1/15-1/30+) and use a fast lens (f/2 or faster, preferably f/1.2-1.4). Even then, it'll be hit or miss most of the time, depending on your camera. And make sure you turn off your AF Assist Light.
I have to disagree a bit here. With a fast lens, you are probably looking at a 50mm, 1/15 or 1/30 will pretty much guarantee your photos are worthless due to camera shake. You might get away with such a slow shutter speed if you have a tripod and are shooting a still subject but for a shot on a dark ride you are going to be holding the camera in your hands and everything is going to be moving. Moving and that slow of a shutter speed will introduce more blur than you will want. Also when you are using a fast lens you have to make sure you don't get any over exposures in your shot which will be very likely if you shoot that slow in a lot of the dark rides because there will often be some light spots and if you over expose you can never dial it down post process, though you can get somethings out of under exposed. Best to error on the under exposed than over exposed.

Lastly the fast lens wide open is very difficult to get a good focus on. Best option is to shoot them manual because in low light they don't always focus on what you want they will often focus on the brightest spot whether that is what you want or not... and give the shallow depth of field it is best to focus manual so you can insure the right part of the shot is in focus because with it wide open only a very limited bit is likely to be in sharp focus.
 
Last edited:

BoarderPhreak

Well-Known Member
Naturally you'll want as fast a shutter speed as you can muster, and a wide open lens means you won't have the most in focus (but at a distance it's fine and you're fighting against ISO and shutter speed). A wider lens like a 35mm will afford you more DoF and minimize the effects of a slow shutter speed more. As do stabilized lenses/bodies. Shoot things coming as straight towards/away from you as possible. Sideways you'll emphasize the motion (blur).

I've handheld a 50mm from 1/8s up to 1/25s just fine, but like I said - it depends on the ride. This one's at 1/8s @ f/1.4, ISO 1250 manually focused with a 50mm, no stabilization:

L1005904.jpg
 

sporadic

Well-Known Member
You can get acceptable results with long shutter speeds on rides, just have to time it right and brace yourself. You can get decent DOF as well when distance to subject is great enough. This was a 35/1.4 wide open at 1/10s on my Fuji X-T1. It won't win any awards in the sharpness department, but most of that is due to noise and how the scene is constructed / projected.

DSCF1995
by smerrick, on Flickr

And another with the 35 at 1.4 with a more acceptable 1/80 shutter, much easier to shoot but adequate DOF.

DSCF2164
by smerrick, on Flickr

This shot wasn't fast glass (10-24/4), but was 1/4 second handheld. I had OIS helping me as well so cheating a bit. The pause in the ride and technique (bracing against yourself, breathing) really helps to steady things.

DSCF0676
by smerrick, on Flickr
 

BoarderPhreak

Well-Known Member
If you have a camera that has both an electronic and mechanical shutter (e.g. Fujifilm X-T1 or X-T2) then take advantage of it! Set the shutter to use mechanical up until the limit (e.g. 1/8000s) and the electronic from there. I did this with my X-T2, and you can tell when the "ME" indicator is present. Why? Besides having the shutter speed to cope with bright light, you can then shoot wide(r) open with fast lenses to isolate your subject - without requiring an ND (Neutral Density) filter. The downside is that you can't use the electronic shutter with quickly moving subjects, or you'll get a "rolling shutter" effect. The following image was shot with the 35mm f/1.4 lens wide open at 1/26,000s, ISO 200:

i.php
 

BoarderPhreak

Well-Known Member
Don't be afraid to crank up saturation and contrast in your photos in post; but keep an eye on blowing highlights and crushing shadows. Use all the tools your post-processing software offers to reign them in or expand them as needed. Use manual tools like dodge and burn to treat localized areas. Then hit up the perspective and distort controls to beat your angles into submission. Finally use the heal tool to take out distracting elements (e.g. garbage, people, stray items).
 

BoarderPhreak

Well-Known Member
You don't necessarily have to keep your verticals vertical, but for gawd sake... Keep your horizon horizontal!

In most cases, if the horizon isn't level... It makes for a lousy photo.
 

Register on WDWMAGIC. This sidebar will go away, and you'll see fewer ads.

Back
Top Bottom